Saturday, December 31, 2016

Lee Valley-Veritas PM-V11 Chisels


When I started into woodworking I wanted the best tools around. But realistically quality tools cost money, as we all know. Luckily I was fortunate to work at Woodcraft from the year 2000 through 2004. Lucky is somewhat questionable if I am going to be honest. Lets just say the discount I got prevented me from bringing home a penny of my earnings. I spent all my money on what ever tool(s) I could afford and thought I needed and made some poor choices. Sadly it took a while to realize less means more. Early on I also thought buying new was far better than at flea markets. Boy was I wrong! 

Fast forward to 2016 and here I am selling off excess amount of tools. There are days I feel that I am hoarder. Thank goodness that is over and done with. It is crazy how much stuff I've collected.What was I thinking!

Over the years there has been an uprising of tool makers. Each one making some amazing tools and accessories. Where were these guys when I first started! While I would love to buy everything each tool maker is making, I realistically can't. I am a full-time maker & restorer of furniture and I need to make proper decisions on what I truly need. The hoarding has stopped and I am tired of spending money.    

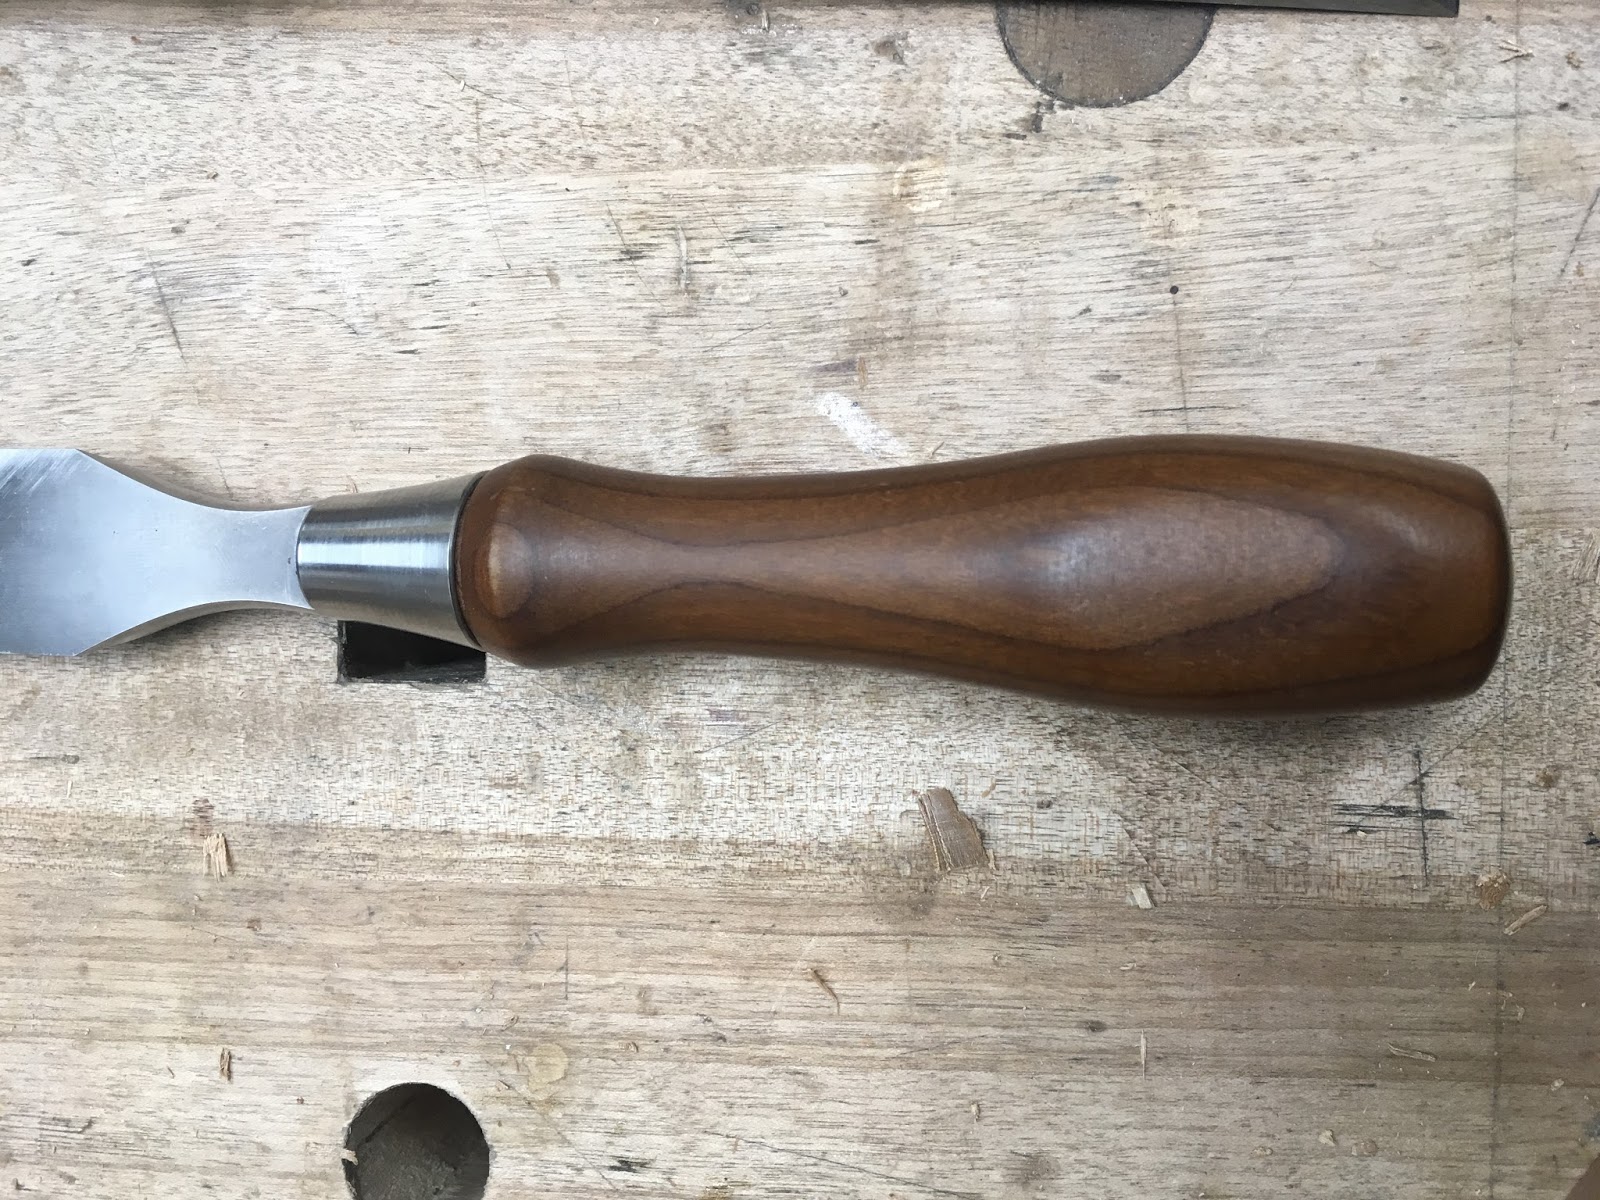
This leads me to the chisels showcased above, Veritas PM-V11's. I have used many chisels old and new, from Witherby, Greenlee, James Swan, Butcher, Stanley, Stanley Everlast, Marples (Boxwood handle), E.A. Berg, Marples Blue Chip, Chapman, Sorby, Pfiel, and Union. From all of these chisels none of them can compare to the Lee Valley PM-V11 chisels. 

These chisels are well balance, easy to sharpen, and hold an edge like no other chisel I have ever owned. Now I haven't owned any other modern made chisels ( Lie Nielsen or Blue Spruce). But from what I have owned the PM-V11 chisels are hands down the best. The edge retention is amazing. The edge of the chisel holds 3x's longer than A-2. 

My sharpening process is simple. I hollow grind on a baldor slow speed grinder with a 6 inch wheel at 27 degrees. I use a honing guide on water stones. I also strop every so often.  

Why 27 degree bevel? I use hard and softwood regularly and 27 degrees is a good working angle. 

Why use a honing guide? Simply because I know how to free hand sharpen which everyone should master. But also my hands are worked hard and a honing guide helps rest my hands. 

Why waterstones? Fast cutting. But I do own oilstones and diamond stones for other forms of sharpening. 

What kind of water stones? Sigma and Shapton. 

Really the message I am trying to share with you is save your pennies and buy the best set of chisels once. You will be happy you did. 

Cheers,

FR

Dovetailed School Box Class at Lie Nielsen Tool Works


I have been blessed with the opportunity to teach at Lie Nielsen Tool Works on Saturday & Sunday, June 3-4, 2017. The class will be offered at Lie Nielsen Toolworks located in Warren, Maine.  Please visit the following link to see further information; Lie Nielsen Toolworks.

I will like to also thank Chris Schwarz from Lost Art Press for offering a similar class in pass years and for giving me permission/opportunity in offering this class.

The school box projects came to fruition from a book published by Lost Art Press titled, The Joiner and Cabinet Maker. I highly recommend the book and its one of my favorite books ever published.  

As with any project I try to make or teach, I like to visually break down the piece into basic elements. This is nothing more than a box that meet at 90 degree corners.  The wood of choice is eastern white pine. The joinery used to make the box are dovetails, which is nothing more than a jig saw puzzle.  The bottom of the case and the moldings are simply hand planed and nailed on. The hinges and cubby inside the box are nothing more than grooves and mortises cut to a certain length, width, and depth.  The School Box is nothing more than learning how to master hand tools and understand a systematic approach to making a box.

If all else fails we can always paint the box and no one will ever notice any of the so called issues you think everyone else will see. But really this box gets you the student/maker ready to tackle bigger pieces. For every single piece of furniture made is simply constructed with dovetails, miters, and mortise and tenon. 

Come join me as we explore the school box made all by hand with dovetails, miters, mortises, and dados. Oh and don't forget the nails.  


Tool List:

Below are some of the tools we'll learn about in the class. We encourage you to bring your own tools or buy the required tools when you get here, as there are not enough classroom tools to outfit everyone.Please do not bring tools in need of repair or major fettling – there will not be time to fully tune them for use during the workshop.Please keep in mind, the best way to guarantee available tools for the class is to call ahead with an order. Some items on this list may be specific to another toolmaker. 

Please call Lie Nielsen Toolbars with any questions. Note: The list below references tools Lie-Nielsen carries, though you are welcome to bring tools from other makers.


  • Pencils
  • Notepad
  • Marking Knife (X-Acto style, with extra blades recommended)
  • Flat head & Phillips head Screwdrivers
  • Hammer
  • Awl
  • Fret Saw

Wednesday, November 16, 2016

Branding your business. Where to begin. Or to continue doing.


Branding your business and your name is where I recommend every business owner to start and to keep in mind as the business gets more established.  

Here is some advice that I wish I received when I started.

Branding the business: 

Define the overall aspirations and goals.
Conduct research in your area and see the demands in the area that can be filled.
Assess your current state in skill, knowledge, overhead, machinery, etc.
Create your game plane. 
Establish your brand. 
Manage your brand. 

So where am I as a business today? My business is growing regularly.  I have established a website. I have a  google page, a yahoo page, yelp page, yellow pages ad, google + page, Facebook and Instagram page, and list can go on. 

I am constantly adding to each of these pages to show the world I am still active and my skill is diverse. I am trying to share that I'm a jack of all trades, and I if I don't know how to do something than I know I can find someone who does. 

I am also preparing myself to demonstrate at art festivals, home furnishing shows, craft fairs, or the like.  This helps my business and my name get further established. I have this blog that you are hopefully following and enjoying. All these elements help further my business. Lastly I am trying to write an article or 2 each year if possible to further get myself in people's view.   

So where does that lead me to next?

Currently I am trying to further to establish my brand and by letting my logo and name speak for me. This is why I am purchasing a branding iron to mark not only my furniture but also my wood wares.  
Wood wares like cutting boards for example are a perfect piece of advertisement. By having your business branded on an item regularly used by patrons will hopefully remind them of you and your business. Obviously cutting boards isn't the only thing I do, but getting the client to sometimes remember is a different story.  This is why a cutting board with my branding is important. 

I am going to take this branding further by using the same layout of the banding iron and turning it into stickers, magnets, pens, hats, a new business shirt, sweaters, hoodies, pens, pencils, notepads, etc.  I am not telling you to do all of this at once, but rather consider them as the business grows.   

Branding iron to be made. Simply but informative

The branding iron is just another way of further establish my brand. Next comes the rework of the business card.  A business card needs to be clean and attractive. Printed in quality paper and easily readable.  I am also a believer that a business card has two sides. By adding my services on the back of a card, it kindly reminds patrons what else I can do to better serve their needs.
I am still modifying the business card. But this is a great start. 

While these two features seem obvious few actually go out and do them.  Which is why its important for me to share with you some tips on how to start.

Many thanks to Jasper and my better half Krista for helping me further establish my brand. 

Hope this helps. 


Sunday, October 30, 2016

Grain direction.

Grain direction is usually first hurdle most students need to understand.  Often I tell students that the wood will point the way- almost like arrows. When using machines to mill wood down I often say the wood will speak to you.  What I mean by this is that wood will splinter and tear out and you can hear it as it pass though or over a machine. I  am a big believer of visual aids versus trying to explain the process on a blog post. Below you will find 3 images that are very informative and can really answer many of the questions beginners have when starting to get into woodworking.  


Sunday, October 16, 2016

Window Bench

The completed cherry window bench 12 feet long 42 inches wide and 15 inches tall

Here you can see dividers and back put together with pocket screws.
Using pocket screws really speeds up the process and allows to correct any unforeseen issues.  
The window bench was constructed with modern construction. The use of domino loose tenons, pocket screws and plywood was used.  The reason for modern technology and joinery is simply due to budget, time, location, and situations.  Material of choice is cherry and cherry plywood primarily. The top was made with poplar as well to help reduce expense.
Please note how light the cherry looks compared to the final result. 


After the base is assembled duct work was added.  

Many thanks to Paul Jasper for all the help and guidance throughout the job. 


Custom made blast gates CNC'd.  


Water stain from General Finishes was the perfect match for surrounding paneling in the home.
I am happy with the overall result and that its over.  


What a Maker really means....


If you ever wanted to be a professional maker/restorer than one must first truly understand how half of my time is spent.

As a maker/restorer its never enough to be just a skilled furniture maker or furniture restorer, you have to be an even better business person - an entrepreneur.  You must be capable of running a business small or large.  What many may not know is 50% of my time is spent performing non furniture related tasks.  The world out there is challenging and the responsibilities are always growing each and everyday. Being a business owner means their is this welcome form of freedom and rewards. But you will be fooling yourself if you don't think there is risk.  It is very important to have business sense and management skills.  

With all that said remember you must enjoy life and your work.  Which is why we got into this craft in the first place.  I am no where near the ideal business man but I strive to become one daily.  

May you all have success in your work.


Saturday, October 1, 2016

Cutting Gauge

The conference in Covington Kentucky known as Woodworking in America proudly hosted by Popular Woodworking was amazing event for so many reasons. But one thing that caught my eye at the event was this amazing English style cutting gauge.  This form of cutting gauge has been on my list for about 14 years, and for some odd ball reason Pat Leach gave a price I couldn't refuse.

There is something about the form of these cutting gauges that just attracts me to them. Its amazing the weight and balance they have and how well they hold the desired setting. But with every old cutting gauge comes the blade that was used. Honestly I never keep any of the old blades. They are often too small and not harden enough to hold an edge.  

Which leads me to the main purpose of this blog post. When needing to make a blade I use old worn or dull jig saw blades.  The way I look at it is, these pieces of metal need be good for something. That is the old Yankee in me I guess.  

My process in making a blade it to grind all the teeth off on a slow speed grinder.  Keep some water near by to cool the metal. Than I eye ball center and form a triangular tip.  After the tip is formed I put a bevel on the right and left side of the tip.  The triangular tip allow for the cutting gauge to be used in a pushing and pulling method.  The knife edge gauges are the only ones I use and find them the only ones worth buying if you are doing hybrid woodworking. 

Layout is by far the most important feature in woodworking. Pencils are not accurate enough. A knife line guides can guide a cut or can be used as a reference when paring with chisels.  Like everything else you must sharpen the tip and I count my strokes on each bevel to ensure even sharpness.  

This may sound like a lot of work but it actually took less than 5 mins to do.      


Jig Saw Blade on the left.
The blade on the right is the result of the teeth grounded and a triangle tip was grounded free hand.  

In this photo the right blade was flipped to show the double bevel. 

The cutting gauge in the english style. 

Free hand grinding the bevel. Angle to the left for the left bevel. Angle to the right for the right bevel.
Its amazing how quickly these bevels form.  

Look at that knife line that has been scribed.

Thursday, August 25, 2016

To fret saw or scroll saw

In the studio I have a window bench that is in its final stages before finishing and install. Currently in the project there is the need to cut rectangular sections from the cherry plywood that make up the facade of the paneling to receive vents openings. This lead me to decide how in the hell am I going to cut the pair rectangles quickly and effortlessly. 

So what are my options... I could use the table saw and figure out starting and stopping points on the fence while referencing max blade height. While this is a clean and quick option there is some risk involved. Option 2 is to bore a hole in the plywood and fret saw the rectangles by hand. Option 3 and  the option I chose is to bore a hole and just use my Delta Milwaukee variable speed scroll and cut right on the line. 

It was amazing how quick and easy this procedure went and with very little to zero clean up necessary.  As always there is more than one way to do a particular method, but most often there is only one correct, safe, and easy way.  So choose wisely.    


Next is to rabbet the opening to receive the vents.

Inpainting

[in-peynt-ingverb. 


A restorative painting procedure focusing on reestablishing color, sheen, and texture to areas of loss on the historic surface of artifacts. This cosmetic treatment attempts to return aesthetic unity to an object. It is differentiated from “overpainting” by limiting the introduction of paint medium to areas of loss only.


The power of color


Finishing and color is by far the most important aspect in furniture making. I use to think it was all about joinery and wood selection, but boy was I wrong.  You will never hear a client tell you boy those dovetails are tight or that they love the piston fit of the drawers. Most often client are going to rub their hands on the piece and say they love how it feels,  or tell you they love smell of the wood -really its the wax, and 9 of 10 they are going to say they love the color.  

How I approach finishing is simple. If it took me 40 hours to make an item I expect to spend 15-20 hours working on the finish. I look at it as 50/50.  Don't skimp on the finish for there is no way one layering of color is all it going to take to make your piece look good.  

Open your eyes to color.....


Tuesday, August 23, 2016

Generous Gift From Mike Mascelli

Mike Mascelli is one of my mentors and friend. I can't ever thank him enough for all that he done for me. I don't know how I will ever repay him for his time and generosity. Today Mike passed by the studio to say hi and give me a gift. Boy what a great eye catching advertising gift.  A gift I will cherish till the day I die.

I thought I did everything right.

Sometimes it doesn't matter the hours of planing, scraping, power sanding, raising of the grain, hand sanding with a series of grits. For there is still that chance something can up. So what do you do if this occurs? Simply swallow your pride and start over. The life of a maker & restorer.

The efforts to dye furniture

I am in the mist of getting a commission of 4 chairs and table done.  The material choice for the commission is American white ash. A wood that I have a love hate relationship with.  I love the white appearance, but having to add color to it can be a real pain. It is amazing how different it is from its cousins the white and red oak.   

As I get ready to water dye the piece and apply finish I first need to go through the surface prep process. I first sand with my Festool sander with 100 grit, raise the grain with water, and than 150 grit.  Next came the hand sanding with 220 and 320 grit.  


Once the surface prep is done I apply my custom mix of transtint colorants with a rag first and than with a foam brush.  Finally when the dye has dried I can start applying varnish.  A lot more work than most may think.


Sunday, August 21, 2016

Lets joint some wood!


The jointer! I can't imagine life without it. Well I don't use the Stanly jointer plane as regularly as I do the Powermatic jointer.  Especially since I installed a helical head in this bad boy. Time is money as I like to say. Grain direction? What is that. There really isn't grain direction with a spiral helical head with solid carbide inserts.  I like to teach students how I learned my craft. First master the hand plane and than the machine. Learn the limitations of both. There are plenty of moments one jointer is faster than the another. But always end with a sharp plane. This is what craft is all about, a balance between machine and power.

Friday, August 19, 2016

Custom banding made and sold


The time has come to share with the world my talents, cough, cough.  Well lets stay humble.  I love what I do as an artisan.  One of my specialities is making banding. I have made 100's of different banding. Most are period inspired while others are custom.  While banding isn't difficult to make there is large learning curve. So why not just order some.

I make many of the banding to order with many are on hand.  My goal is to have about 25-30 different banding on hand. If I don't have it on hand than there is a short waiting period and there is a minimum order to justify spending my time making them.

I will posting my banding at first on my Etsy store which I am making currently. I'll write another blog post when the store is open or full.  In the near future I will have my own e-commerce store, but right now this is just easier. I have too many irons in the fire currently.  

I make many of my banding in 40" inch lengths, which ideal for all projects.  The strips are all sawn 1/16" heavy for easy of install, planing, scraping, and future repair.  I make them out all domestic and exotic woods. Please note there is a 50% waste factor when making banding. The waste factor is the saw kerf.


Stay tune for there will be a ton of offerings.


Saturday, July 30, 2016

Spring steel make the best chisels!


When working with stringing for accenting or accentuating a piece cutting the groove and cleaning out the groove can be difficult.  One of favorite methods for cleaning out the grooves is to make a makeshift chisel from old bandsaw blades, or  badly damage hand saws, or even card scrapers. Having a selection of spring steel in varying thickness is useful to have in the studio. Before starting the chisel be certain that the steel will fit in the groove. The chisel doesn't have to be exactly the same width of the groove but the last thing you want is the need to remove thickness. Trust me!

If using a bandsaw blade like I have shown in the photo, I first grind all the teeth off while being cautious not to over heat the metal. Keep some water near by to help keep the steel cool. Than I hollow grind what will be the chisel end. Grind the side where the teeth once wete. We want to keep the flat square edge or what was the back of the bandsaw blade as the bottom reference of the chisel. The radius of the chisel's tip  doesn't matter. I also don't grind all the to the very edge. The process is no different than grinding a plane iron or chisel.

After grinding I hone the tip like any chisel. The edge doesn't have to be wicked sharp, just sharp enough.  Now you have a chisel ready for all sorts of delicate cuts.


Wednesday, July 13, 2016

Quote by Herman Hesse on Trees....


“For me, trees have always been the most penetrating preachers. I revere them when they live in tribes and families, in forests and groves. And even more I revere them when they stand alone. They are like lonely persons. Not like hermits who have stolen away out of some weakness, but like great, solitary men, like Beethoven and Nietzsche. In their highest boughs the world rustles, their roots rest in infinity; but they do not lose themselves there, they struggle with all the force of their lives for one thing only: to fulfil themselves according to their own laws, to build up their own form, to represent themselves. Nothing is holier, nothing is more exemplary than a beautiful, strong tree. When a tree is cut down and reveals its naked death-wound to the sun, one can read its whole history in the luminous, inscribed disk of its trunk: in the rings of its years, its scars, all the struggle, all the suffering, all the sickness, all the happiness and prosperity stand truly written, the narrow years and the luxurious years, the attacks withstood, the storms endured. And every young farmboy knows that the hardest and noblest wood has the narrowest rings, that high on the mountains and in continuing danger the most indestructible, the strongest, the ideal trees grow.

Trees are sanctuaries. Whoever knows how to speak to them, whoever knows how to listen to them, can learn the truth. They do not preach learning and precepts, they preach, undeterred by particulars, the ancient law of life.

A tree says: A kernel is hidden in me, a spark, a thought, I am life from eternal life. The attempt and the risk that the eternal mother took with me is unique, unique the form and veins of my skin, unique the smallest play of leaves in my branches and the smallest scar on my bark. I was made to form and reveal the eternal in my smallest special detail.

A tree says: My strength is trust. I know nothing about my fathers, I know nothing about the thousand children that every year spring out of me. I live out the secret of my seed to the very end, and I care for nothing else. I trust that God is in me. I trust that my labor is holy. Out of this trust I live.

When we are stricken and cannot bear our lives any longer, then a tree has something to say to us: Be still! Be still! Look at me! Life is not easy, life is not difficult. Those are childish thoughts. Let God speak within you, and your thoughts will grow silent. You are anxious because your path leads away from mother and home. But every step and every day lead you back again to the mother. Home is neither here nor there. Home is within you, or home is nowhere at all.

A longing to wander tears my heart when I hear trees rustling in the wind at evening. If one listens to them silently for a long time, this longing reveals its kernel, its meaning. It is not so much a matter of escaping from one's suffering, though it may seem to be so. It is a longing for home, for a memory of the mother, for new metaphors for life. It leads home. Every path leads homeward, every step is birth, every step is death, every grave is mother.

So the tree rustles in the evening, when we stand uneasy before our own childish thoughts: Trees have long thoughts, long-breathing and restful, just as they have longer lives than ours. They are wiser than we are, as long as we do not listen to them. But when we have learned how to listen to trees, then the brevity and the quickness and the childlike hastiness of our thoughts achieve an incomparable joy. Whoever has learned how to listen to trees no longer wants to be a tree. He wants to be nothing except what he is. That is home. That is happiness.”


Tuesday, July 12, 2016

Leonardo da Vinci.... Drawing materials.


Recently a great video was shared on with me on the materials Leonardo da Vici used in his period. To see this video please visit Leondaro da Vinci drawing materials.


Friday, July 1, 2016

This is boring, so go screw....


Trying to find quality wood screws today is like trying to find a needle in a haystack. Many years ago when I was a student at the Furniture Institute of Massachusetts I noticed Master Lowe had tonnage when it came to vintage slotted wood screws. Phil always lectured me and emphasized a restorer always has the right screw.  Well guess what  I love "SLOTTED" raw steel wood screws.You know the good old MADE IN THE USA wood screw that was made with pride.  There was even a time when screws were made with threads that would cut the skin on the tips of your fingers. Many users would complain about this issue, but really they never understood the reasoning why they were so sharp. Sharp threads gave the "maker" assurance that the two pieces would mechanically bonding together and never loosen.   
Today wood screws are weak, fragile, and begging to be stripped and broken.  Which leads me to the purpose of this blog post, the importance of using the proper countersink and tapered drill when boring holes for screws. Like many products made today finding quality countersinks with a tapered drill can be difficult. I have tested many and broken a ton. But than there is the W.L. Fuller bits made proudly in USA in Providence, RI.  

W.L. Fuller Co Inc. is a family owned, third generation, manufacturer of the best Countersinks, Counterbores, Plug Cutters, Taper Point Drills, Brad Point Drills, and Step Drills. All made 100% in the U.S.A. today. With over 60 years experience manufacturing tools to cut woods, plastics, and metals, we can recommend and supply the tools you need to get the job done while saving you time and money. All of our products carry our “Satisfaction Guarantee”. Most orders are shipped the same day they are received. W.L. Fuller Co Inc. also stocks and distributes woodworking tools from other U.S. Manufacturers.  (Copied and pasted from W.L. Fuller website)


For 15 years I've owned this basic set and it has served me better than any similar product. I have since added bigger sizes to the basic set for wood screw sizes #12, 14, 16, 18, and #20 screws.  But for most of you the set showcased is all you need.   


I am also a little fastidious on having everything looking as perfectly as possible, so I use a stop collar on my countersinks.  The stop collar ensures consistency. If that wasn't bad enough I also clock my screws so they all point the same way.

Lastly if you ever need to make small plugs, than simply remove the tapered drill bit, use a short length of drill rod that fits in the corresponding countersink, tighten the set screws, mount the countersink in drill press and bore away. Endless supply of plugs.


Cheers,

FR


Friday, June 3, 2016

Sharpening stones and strops.

I often get asked about sharpening stones and the so called mystery of them.  Often I know the question(s) before the person even asks. Water versus  Oil stones? My response to them is usually what about natural, diamond or sand paper for sharpening? My response usually leaves the students more confused. So I follow up my previous response with water stones cut fast and get out of flat. Oil stones are cut slow but stay flat.  Diamond stones cut great but often doesn't get the sharpness level high enough for certain situations. Sandpaper works fine but will cost more than the stones in the end.  Natural stones are awesome and work like any other water stones.  Than there is ceramic water stones which are great and they don't need to be soaked in water, which is the real advantage.

The other question that comes up is do I strop? Usually my response is who doesn't!

But one of my other favorite questions is what do I think about honing guides versuses free hand sharpening?  Honestly, honing guide are great but you can't sharpen every tool with a guide. I would say you need to learn how to free hand sharpen every tool, but there is nothing wrong with using a honing guide.  

In the end it doesn't matter what you use to sharpen. All that matters is the tool is SHARP. I don't care if the edge of the tool shaves the hair off your skin, because I can shave off all the hair on my arms with a dull tool with out issue.  I don't care how good the edge cuts the end grain on eastern white pine. Often I see woodworkers testing the sharpness on pine and once they are happy with the results they go over and cut some mahogany, walnut, or some other species. Why did theybother testing on a piece of pine. 

All I care about is getting the job done. No one is going to see the bottom of my mortises or the bottom of my dovetail sockets. So sharpen often and  strop often. Once you notice resistance hone or strop the edge.  Rarely do I go a day without sharpening. Often I sharpen the same tool 3-4 times in a single day.  

One important detail that is often not asked is compound do I use on my strop? I use to apply yellow stone but this particular  product has disappeared from the market. For the last 6 months I have been using Autosol which I was introduce to by Robin Wood in the UK.  Where do I buy it? Google it. What I can say is say about the compound is by far the best I have ever used.  

Now go out and sharpen. 

Cheers.


Saturday, May 21, 2016

Mr. James Krenov.....

Masters who have develop a style of furniture are far and few in between. A few master that come to  mind are Jere Osgood, Tage Frid, Sam Maloof, George Nakashima, Silas Kopf, James Krenov. All of these makers have left their stamp for all of us to enjoy and some still are. That said it is up to us as craftspeople to help carry their name for the next generations. 

Just recently foundations for passing masters have been established. The most recent is the Krenov foundation, which is working hard to have the voice of James Krenov be heard, cherished and remembered.  This is very exciting news for me, I love period furniture but boy do I love Krenov style furniture as well. 

This pass week a new video was posted on youtube by the foundation. The short video gives us a glimpse of the man the legend James Krenov.  I never got to meet Mr. Krenov, but boy do I know many craftspeople who can share his love and wisdom. 

Now enjoy this new video and the voice of James Krenov. 


Fire wood they say!

Just fire wood they say. Oh these pieces are a pain to split they say. Why would I want these chunks of wood, they are junk.  

Well folks I think other wise. These pieces have a name and its the fork of the tree or the "crotch" of the tree. The fork of the tree is where two branches form/split. This is also the location where the two trunks of the tree fight to gather minerals, water, and form a compressed figure. This figure is known as "crotch" please photos below. Isn't mother nature amazing!!! As they say a picture is worth a thousand words. I like to say these pieces will add thousand(s) to my work. 

I was able to split two small pieces of crotch birch and maple on the bandsaw, joint them with the helical head and then resaw them to veneer on the bandsaw. The bandsaw blade of choice is the wood slicer from Highland Hardware in Atlanta, Georgia. I only jointed the boards once and than sliced 1/16" thick pieces. It was amazing to see every slice cut so beautifully. I can't wait to add these pieces to my work/line of furniture. 

So I leave you with this. Think before you split or burn. Think about the future. Quality wood or even  certain species of wood are getting more difficult to find. Every piece is worth saving and using. Mother nature is amazing but she can only produce so much.

Cheers
FRoman  


Thursday, May 19, 2016

I was fooled.


Grain direction is key when working wood by hand. When I am teaching you can always hear me preaching the wood will speak to you. Light cuts. Sharp tools. Focus. Remember its only wood, and it grows on trees. Now if the wood doesn't speak to you than it will point to you how it wants to be planed/worked. That said there are always exceptions to the rule. Perfect example is cherry board showcased above.  The grain is pointing from left to right. This tells me to push my plane left to right. Well think again my friends, think again.  I went left to right with a sharp plane and tear out city is what I got.  For some odd ball reason I said well I'll take my low angle jack from Lie-Nielsen and come right to left and see what the results will be. Well the results were amazing. The edge was smooth and glistening. Who knew!!!

Today's lesson is, don't be fooled. There is always an exception to the rule.


Cheers!

Monday, April 18, 2016

Veneering a round apron!

Currently I am making a custom round breakfast table and four chairs. The wood of choice for this project is mostly American Ash, with the only exception being the apron of the table being made from Tulip Poplar. The aprons will be cross banded with 1/16 poplar and than veneered with ash.  The reason for cross banding the rim is to stabilization and reduce wood movement. 

Before veneering the aprons I toothed the substrate. The tool of choice is a jig saw blade in a kerf of scrap wood.  Toothing the surface ensures good adhesion and visually showcases a flat and consistent substrate.  I will be using Old Brown Hide Glue simply because of the open time, the lack of finishing concerns, and if some how I screwed something up I can reverse it.  More importantly I don't have to be careful with the glue and clean up is easy. 

Toothing the substrate.

To glue the veneers down I needed to make a ton of clamping fixtures. The clamping fixture is nothing than two pieces of plywood with screws bored into them at a width wider than the apron and veneer. I can't take any credit for this of this method. I first learned this technique from Master Will Neptune and he learned it from Tage Frid.  

Clamping fixture. Top plywood piece gets an oversized holes.
The lover plywood is bored for smaller to grab the treads.

To make these cauls work you must use quality multiply plywood and bore the holes to the top and bottom caul exactly in the same location. The top caul will have a hole bored into it that well oversized for the coarse dry wall screw. The bottom will caul will have a proper hole bored to ensure the threads of the screw will bit and pull the upper clamping call down.


Cutting 1/16 inch thick veneer to oversized width.
The tool of choice the French flush saw/veneer saw.

Jointing edges of veneer. The length of veneer was determined by the distance between bridal joint.  
Jointing lengths of end grain veneer straight in a french style shooting board.
 
Making certain the length of veneer line up straight. 

The Packer 3S is an essential tool if regularly working with veneer.


Seaming the joint. Every joint gets at least 3 horizontal strips of veneer tape.
When applying the veneer tape make sure to pull the tap at the ends.
Allowing the tape to dry will help further pull the joint tight at the seam.
Lastly apply one one vertical strip of veneer to strengthen the seam. 

Laying the veneer on the rim and ensuring I have enough in length and width. 


Clamping cauls in place. Spacing between each caul is roughly 3/4 of an inch. 

Bending plywood  or wacky wood it is also call was added on top of the veneer as a backing.
I applied packing tape to the face of the veneer to ensure the wacky wood wouldn't stick. 

As you can see there are a ton of clamping cauls were necessary.
I used blue tape in the center and on both ends to help ensure alignment. 
The most important concern is to ensure there is enough overhang on each edge of the rim. 

I made sure to applied glue on each surface and in every seam.
Some visual squeeze out is okay. 
The bricked rim with 100's of clamping cauls.
Clients will never truly understand the efforts. This is why I blog about it. 

Flushing the veneer to the rim. Next is round 2. Veneering the Ash show veneer.