Saturday, May 21, 2016

Mr. James Krenov.....

Masters who have develop a style of furniture are far and few in between. A few master that come to  mind are Jere Osgood, Tage Frid, Sam Maloof, George Nakashima, Silas Kopf, James Krenov. All of these makers have left their stamp for all of us to enjoy and some still are. That said it is up to us as craftspeople to help carry their name for the next generations. 

Just recently foundations for passing masters have been established. The most recent is the Krenov foundation, which is working hard to have the voice of James Krenov be heard, cherished and remembered.  This is very exciting news for me, I love period furniture but boy do I love Krenov style furniture as well. 

This pass week a new video was posted on youtube by the foundation. The short video gives us a glimpse of the man the legend James Krenov.  I never got to meet Mr. Krenov, but boy do I know many craftspeople who can share his love and wisdom. 

Now enjoy this new video and the voice of James Krenov. 


Fire wood they say!

Just fire wood they say. Oh these pieces are a pain to split they say. Why would I want these chunks of wood, they are junk.  

Well folks I think other wise. These pieces have a name and its the fork of the tree or the "crotch" of the tree. The fork of the tree is where two branches form/split. This is also the location where the two trunks of the tree fight to gather minerals, water, and form a compressed figure. This figure is known as "crotch" please photos below. Isn't mother nature amazing!!! As they say a picture is worth a thousand words. I like to say these pieces will add thousand(s) to my work. 

I was able to split two small pieces of crotch birch and maple on the bandsaw, joint them with the helical head and then resaw them to veneer on the bandsaw. The bandsaw blade of choice is the wood slicer from Highland Hardware in Atlanta, Georgia. I only jointed the boards once and than sliced 1/16" thick pieces. It was amazing to see every slice cut so beautifully. I can't wait to add these pieces to my work/line of furniture. 

So I leave you with this. Think before you split or burn. Think about the future. Quality wood or even  certain species of wood are getting more difficult to find. Every piece is worth saving and using. Mother nature is amazing but she can only produce so much.

Cheers
FRoman  


Thursday, May 19, 2016

I was fooled.


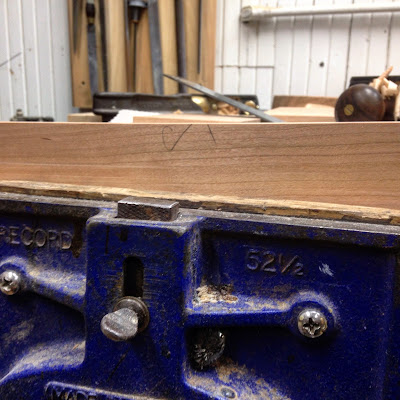
Grain direction is key when working wood by hand. When I am teaching you can always hear me preaching the wood will speak to you. Light cuts. Sharp tools. Focus. Remember its only wood, and it grows on trees. Now if the wood doesn't speak to you than it will point to you how it wants to be planed/worked. That said there are always exceptions to the rule. Perfect example is cherry board showcased above.  The grain is pointing from left to right. This tells me to push my plane left to right. Well think again my friends, think again.  I went left to right with a sharp plane and tear out city is what I got.  For some odd ball reason I said well I'll take my low angle jack from Lie-Nielsen and come right to left and see what the results will be. Well the results were amazing. The edge was smooth and glistening. Who knew!!!

Today's lesson is, don't be fooled. There is always an exception to the rule.


Cheers!

Monday, April 18, 2016

Veneering a round apron!

Currently I am making a custom round breakfast table and four chairs. The wood of choice for this project is mostly American Ash, with the only exception being the apron of the table being made from Tulip Poplar. The aprons will be cross banded with 1/16 poplar and than veneered with ash.  The reason for cross banding the rim is to stabilization and reduce wood movement. 

Before veneering the aprons I toothed the substrate. The tool of choice is a jig saw blade in a kerf of scrap wood.  Toothing the surface ensures good adhesion and visually showcases a flat and consistent substrate.  I will be using Old Brown Hide Glue simply because of the open time, the lack of finishing concerns, and if some how I screwed something up I can reverse it.  More importantly I don't have to be careful with the glue and clean up is easy. 

Toothing the substrate.

To glue the veneers down I needed to make a ton of clamping fixtures. The clamping fixture is nothing than two pieces of plywood with screws bored into them at a width wider than the apron and veneer. I can't take any credit for this of this method. I first learned this technique from Master Will Neptune and he learned it from Tage Frid.  

Clamping fixture. Top plywood piece gets an oversized holes.
The lover plywood is bored for smaller to grab the treads.

To make these cauls work you must use quality multiply plywood and bore the holes to the top and bottom caul exactly in the same location. The top caul will have a hole bored into it that well oversized for the coarse dry wall screw. The bottom will caul will have a proper hole bored to ensure the threads of the screw will bit and pull the upper clamping call down.


Cutting 1/16 inch thick veneer to oversized width.
The tool of choice the French flush saw/veneer saw.

Jointing edges of veneer. The length of veneer was determined by the distance between bridal joint.  
Jointing lengths of end grain veneer straight in a french style shooting board.
 
Making certain the length of veneer line up straight. 

The Packer 3S is an essential tool if regularly working with veneer.


Seaming the joint. Every joint gets at least 3 horizontal strips of veneer tape.
When applying the veneer tape make sure to pull the tap at the ends.
Allowing the tape to dry will help further pull the joint tight at the seam.
Lastly apply one one vertical strip of veneer to strengthen the seam. 

Laying the veneer on the rim and ensuring I have enough in length and width. 


Clamping cauls in place. Spacing between each caul is roughly 3/4 of an inch. 

Bending plywood  or wacky wood it is also call was added on top of the veneer as a backing.
I applied packing tape to the face of the veneer to ensure the wacky wood wouldn't stick. 

As you can see there are a ton of clamping cauls were necessary.
I used blue tape in the center and on both ends to help ensure alignment. 
The most important concern is to ensure there is enough overhang on each edge of the rim. 

I made sure to applied glue on each surface and in every seam.
Some visual squeeze out is okay. 
The bricked rim with 100's of clamping cauls.
Clients will never truly understand the efforts. This is why I blog about it. 

Flushing the veneer to the rim. Next is round 2. Veneering the Ash show veneer. 


Sunday, April 17, 2016

Steam Bending Kiln Dried Wood

Recently I needed to steam bend some American Ash for a prototype chair commission. I am not a fan of steam bending kiln dried lumber, but due to time restraints this is all I could find.  The lean of the upper back posts is 2 inches from vertical. I made the clamping fixture with a 21/2 inch lean for the expected/guessed spring back. 

When steam bending thick material a common rule is for every inch in thickness means at least one hour in the steam box. I broke the so called rule for it took 4 hours in the steam box to bend the back posts in position.  I allow the bend to set for several days before removing them from the fixture. The spring back was almost perfectly estimated. 


Bending fixture.  

Pine steam box screwed together. Dowels to hold parts.
A wallpaper steamer was the tool of choice. 

Forms with dowels and folding wedges to hold the bend in place. 

Thursday, April 14, 2016

The Luxury of Mahogany

Many have said the world was once shaped by the trading, importing, and exporting of wood.  The wood of luxury for early America was no other than Mahogany.  What wood other than Mahogany would have been covered for 6 out 7 courses in a meal and than showcased in desert course.

Mahogany is truly a joy to work with. I often compare the joy of working with mahogany to Eastern White  Pine.  Over my short 16 year career in furniture making and repair one thing is certain, the quality of Mahogany has gotten worse. But what choice do restorers have when needing Mahogany for a historic home or piece of furniture? Well I think we need to start thinking long and hard on how our love for Mahogany effects the world.  If interested in understanding the effects of such a luxury material than please read the following link: Mahogany's last stand.   

Today I don't purchase much or if any exotic materials of recent import.  What I do own for exotic materials is either from my early days in the field when I didn't know better or simply old stock from estates. I think craftspeople today should enjoy local domestic woods that have been harvested in a sustainable manner.

Mahogany 

Mahogany Seed Pod